The Best Pull Fid Is A Coat Hanger
It really is.
I have struggled with the last bit of splicing continuous control lines - the bit where you pull one end of the rope through the the other bit of rope.
It is tricky at the best of times and the usual pull fid always bunches the end of the rope a bit, even if you try to taper it. You are supposed to trap the end like this:
but that loose end either bunches up and makes it very difficult to pull through OR it slips off halfway through the process and you have to start again. I wrote a blog post about it called "Continuous Confoundment". I thought Marlow's control line might be partly to blame, but now I am not so sure.
During my recent splicing attempts I had to apply a lot of force to try to finish the splice and my pull fid wire started to come apart. £20 they are for a new one 😢 - it looked like this (you can see the wire fraying in the loop):
Although I could just buy a new one the whole process was annoying me, not just the cost. It didn't seem like a very good way of trapping the rope. I saw the needle fids:
and although these look more likely to work, the method of trapping the end of the rope is really the same - plus this kit is around £40.I wondered if I could try something else. Small diameter PVC tube - would that work? Apparently we have some knitting needles in the house somewhere and I toyed with the idea of trying one of those. But before I tried out those ideas it struck me that the simplest and cheapest thing we had in the house that might work is a wire coat hanger. If it didn't work at least it wouldn't cost me anything to give it a go.
So I got one and used pliers to untwist it a bit:
Once you cut a length of the inner core out of the control line:
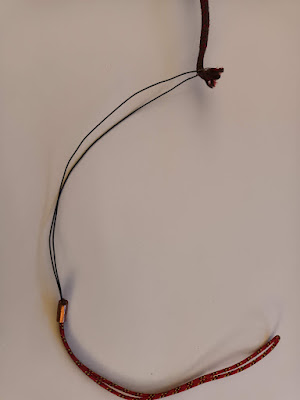
and wrapped some insulating tape around both; winding it around the rope first and then kept going until I wrapped it around the coat hanger too:
You can see from this the rope isn't bunched up at all. And the tape seems to hold the rope to the wire firmly. And when I pulled it back into and along the hollow of the other bit of rope it went through with almost no fuss at all - I just had to go carefully as the tape and rope went inside the other rope. Took a minute, when my first attempt with a "proper" pull fid took me two hours.
So if you are about to do some splicing for your new continuous control lines please send me £20 and I'll send you a bit of my coat hanger - I may even throw in some insulating tape 🤣
PS Some useful videos on splicing...
Rooster - Spec 12 (no-cover dyneema) eye splicehttps://youtu.be/HiOzEELTWp4
or this one (same technique for a halyard)
https://www.youtube.com/watch?v=67oKWtNQaRU
Continuous control lines
https://youtu.be/nXMcq5Hr9PQ
Eye splice in continuous control line cord
(for an Aero halyard, but works for any eye spice in this type of rope)
https://www.youtube.com/watch?v=IW_7S338uYQ
Premium Ropes - Eye splice no-cover dyneema with only one end loose
https://www.youtube.com/watch?v=4WW7Qvg3VjI


Comments
Post a Comment